
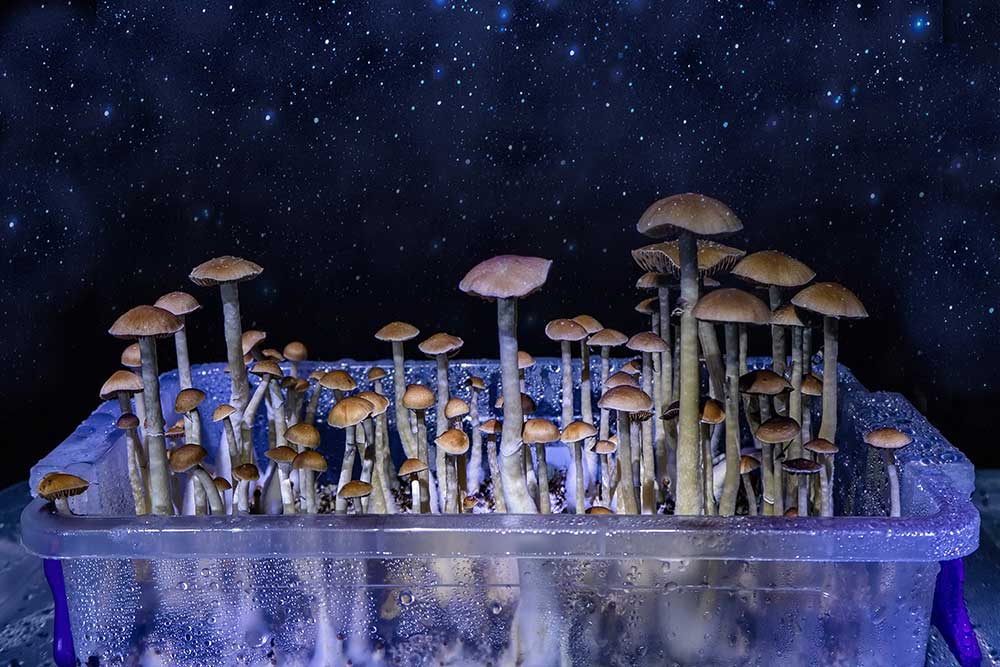
Casing Techniques for Magic Mushrooms
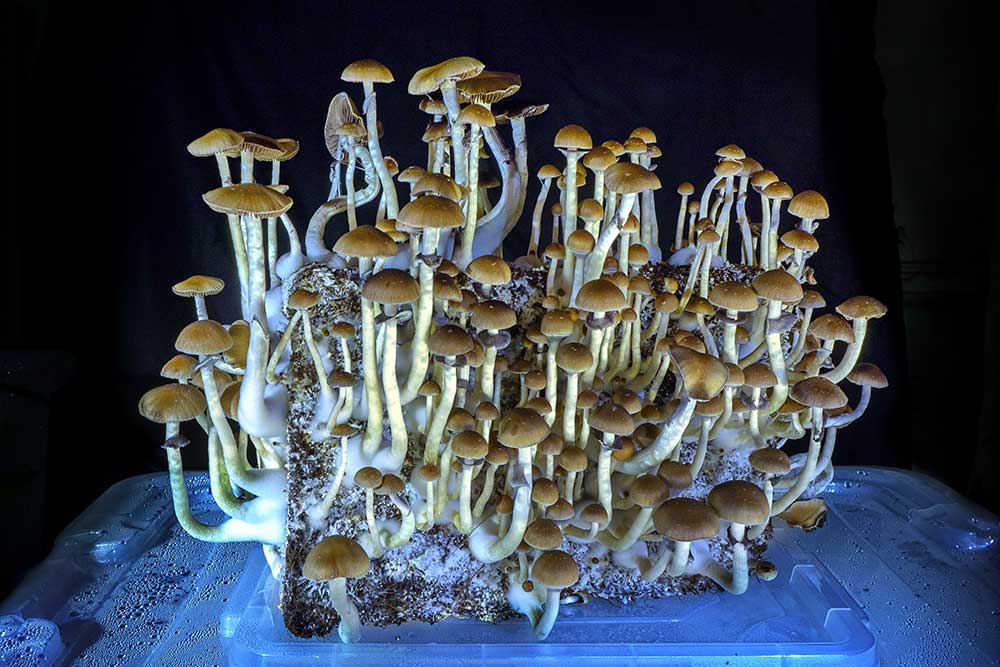
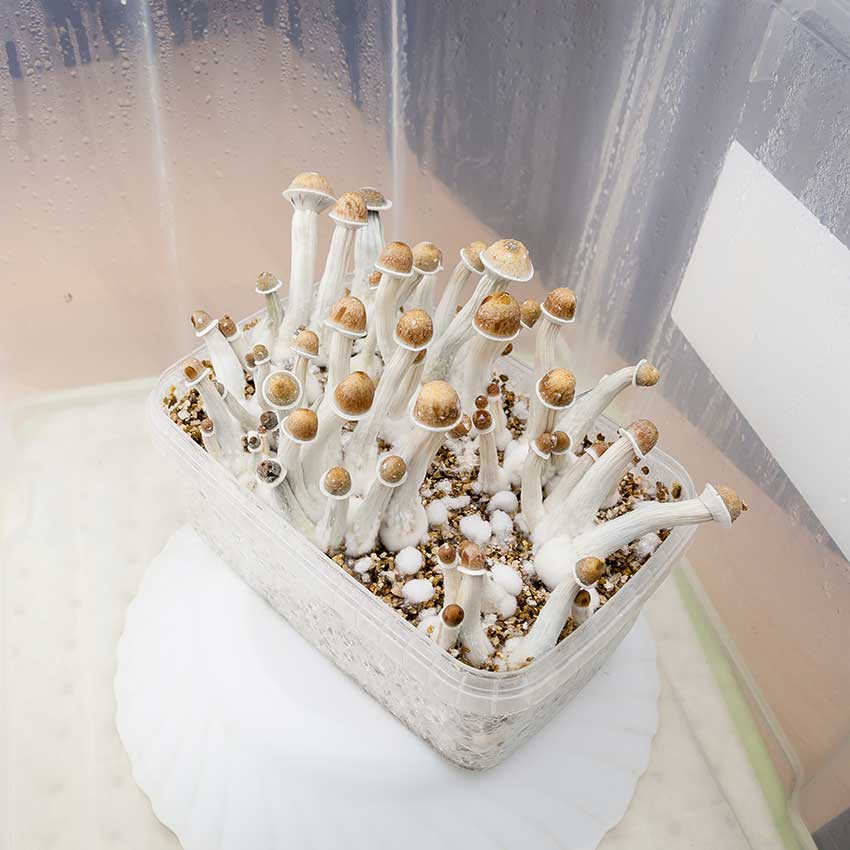
If you’ve ever wondered about getting the most “bang for your buck” when growing mushrooms for personal use, there’s really no better way to cultivate high volumes of shrooms than casing. Mushroom casing is the age-old method of growing a lot of mushrooms in a small, contained space – such as the size of a briefcase, hence the term “casing”. Casing tek involves a small-medium sized container, a mushroom casing layer of substrates for the shrooms to grow in, some inoculated cakes or spore syringes, and a burgeoning passion for mycology to boot.
Mushrooms casing has been around for decades, possibly even centuries – there’s some theories that this could be a traditional practice passed down from ancestors like Mesoamericans and First Nations peoples. Today, casing techniques are a very efficient, affordable and consistent way to get a full bloom of potent mushrooms. This kind of casing tek is very popular among magic mushrooms cultivators because it can be done indoors, doesn’t take up much space at all, and can be very cost-effective for the amount of fungi that can be grown.
Growing magic mushrooms in jars is also very popular among myconauts, but mushrooms casing is just superior in so many ways. For starters, the volume of shrooms you can grow is far greater when you jam-pack your fungi on a casing layer. Additionally, there are a lot of subtle ways you can control the growth cycles of your mushrooms when you contain them in a myco-colony like with mushroom casing. On top of all this, mushroom casing is very affordable and doesn’t involve expensive growing mediums or equipment – you can usually find everything you need at your local home & garden store.
If mushroom casing tek is so easy to adopt into your mushroom routine, then why don’t more people do it? Most mushroom advocates are aware of mushrooms casing, but they’ve never tried it themselves because they don’t know how manageable it can be. Also, many shroomers live in areas where wild mushrooms are proliferating, so they might not see much need to cultivate their own. That being said, growing your own magic mushrooms can be a very rewarding and psychedelic enhancing experience. When you consume something you’ve grown yourself – like a fruit, vegetable or even your own medicine, like cannabis or psilocybin – you can derive a lot more benefits from the relationship you develop during the cultivation process. When you put in the hard work, you might savor the flavors more, or notice more about the mushrooms themselves because you’ve watched them grow from spores to bloom.
Are you intrigued by the idea of growing your own mushrooms using casing tek? How difficult is it to make your own mushroom casing layer? Let’s explore some tips and tricks for growing your own magic mushrooms using mushroom casing techniques, so you can experience the bloom-in-a-box for yourself.
WHAT ARE MUSHROOM CASINGS?
When we’re discussing mushrooms casings, we are identifying the actual container (casing) that houses the casing layer, mushrooms within. The main reason you use a case/container for this growing methodology is due to moisture retention. Mushrooms are around 85-90% water, and to maintain their ideal hydration they need to exist in a moist environment, away from direct light or heat sources. Mushroom casings increase your fungi’s chances of recapturing moisture that escapes from the casing layer, as it condenses on the walls of the casing itself.
The other defining feature of a mushroom casing is the mushroom casing layer. Unlike an average growing medium casing layers are crafted specifically with mushroom colonies in mind. Inputs like vermiculite, rice hulls or milled grain flour, and similar ingredients that combine water-retention and food sources for the mycelium.
Next, let’s review what you need and the easy-to-follow steps to follow when making your own mushrooms casing with affordable, DIY casing tek.
MUSHROOM CASING LAYERS & CASING TEK
If mushroom casings are simply a biodome that encapsulates the mushrooms in ideal moisture conditions, what else do you need to successfully cultivate shrooms in casing tek? Let’s go over the steps and what you’ll need to grow magic mushrooms using the casing technique. To begin, you need to choose a container unit, then create a mushroom casing layer and then begin inoculating your mushrooms casing.
Mushrooms Casing Unit
What kind of container you choose is up to you – plastic tupperware, a deep glass casserole dish, or a square planters box. These are just a few options that other shroom growers have turned to for their casings, but the main takeaways to consider when you’re choosing your mushrooms casing is its capability to capture moisture. Obviously, materials like wood, ceramics, cloth or textiles are not prudent container types for moisture retention. Plastics, synthetics, some stone or glass containers will allow moisture to condense within the container itself. As long as your case does not absorb water like wood, or can be chemically altered by prolonged exposure to humidity or moisture (such as metal rusting), then it will be suitable for mushroom casing. Finally, try to use containers that are opaque and not translucent – this is because mycelium are sensitive to light, but you can always tape or cover the outside of your container to reduce the risk of your fungi’s photosensitivity.
Step 0 (pre-Step 1): sanitize your container with non-caustic, natural cleaners or less-harsh chemicals such as eco-certified disinfectants. Mushrooms are very sensitive to the presence of burning chemicals, and even though a myco-colony can repair itself and survive a lot of different environmental conditions, you should limit the amount of exposure they have to potentially harmful chemicals wherever possible. You will be using a mixing bowl and mixing utensil, so sanitize and clean these at the same time as your container. Once your casing tek is sanitized, prepare the other ingredients while you let it air dry.
Casing Layer Assembly
You need to choose the right substrate for creating your casing layer because a mushroom colony can only thrive if it has access to the right kind of growing medium. Vermiculite is a natural choice for two primary reasons. First, it is very effective at retaining water, while balancing the amount of moisture inherent in the material to ideal conditions for fungi (“goldilocks principle”: not too much, not too little). Secondly, vermiculite is mostly inert and free of nutritional value for plants, therefore it does not attract pests, bacteria or molds because it is not a source for energy to these detrimental organisms.
Step 1: there are multiple grades of vermiculite to choose from (coarse, medium, fine), but most growers go with the medium-option because it is the safer option. Once you have a bag of vermiculite, you will also need your mixing bowl and utensil, and 3-4 L of purified, distilled or spring water. The importance of using clean, purified water sources that have not been chemically treated too much is essential – again, mushrooms can be affected by even trace amounts of harsh chemicals or chemical residues.
Step 2: Pour the vermiculite into the container so that it fills about 1-2 inches of the case (don’t compact the medium, this is just to check how much vermiculite you will need to mix in the next step).
Step 3: Dump the measured vermiculite out of the casing container into your mixing bowl. Make sure you get all of the vermiculite out of your case – it doesn’t need to be sterilized again, but try to wipe out all of the medium material with clean hands or an unused micro-fiber cloth. Add water to the vermiculite in the mixing bowl and stir with your mixing utensil. Add just enough water to make it damp to the touch but not soaking wet. Typically, about 2 tablespoons (25-30 ml) of water per ½ cup (120 ml) of vermiculite is a stable ratio. Squeeze a small handful of vermiculite as a final check – it should be moist, maybe drip a small amount, but if a steady stream of water is expunged when doing so you may have added too much water.
Step 4: Spread the moistened vermiculite around the entire casing container. The substrate should be covering the entire bottom of the casing, 1-2 inches deep. DO NOT compact the vermiculite as this will make it more difficult for the mycelium to penetrate the substrate and can lead to root rot or inconsistent colonization.
If you notice that the vermiculite is not as moist after you’ve distributed it in your container, you can add more water as necessary. A mister or sprayer is a great way to introduce more water throughout your mushroom cultivation, but if you are pouring H2O just be sure it is evenly absorbed across the substrate.
Step 5: Next, you will need mycelium jars or mushroom cakes with the strain of fungi you want to colonize your mushroom casing with. Remove the mushroom cakes from the jars using a bag, then (after washing your hands again, or wearing sterilized gloves) crumble the mycelium cakes and distribute them evenly on top of the initial mushroom casing layer. Again, do not compact the crumbled shroom cakes and the first layer of vermiculite, but ensure that the mycelium cakes are spread throughout and evenly distributed, forming another solid layer of about 1-2 inches.
Step 6: You will now add a second layer of vermiculite on top of the crumbled mycelium cakes. The same procedures as in Steps 3-4 except that you will only need ½-¾ of an inch thick this time. This is important because the mushrooms need to be able to penetrate through the top layer of vermiculite as the fruit and bloom. Do not compact any of the layers for the same reason, simply allow the materials to coalesce and naturally compress as the moisture is absorbed throughout your entire mushroom casing layer.
Step 7: Finally, cover the casing with strong, sealable wrap or if you used a container firmly place its lid on top. Take your sealed/covered casing and place it in a neutral temperature, dark area. Room temperature (20-27℃) is an ideal range, but the main factors that you need to worry about are the absence of light and not introducing too much heat or cold.
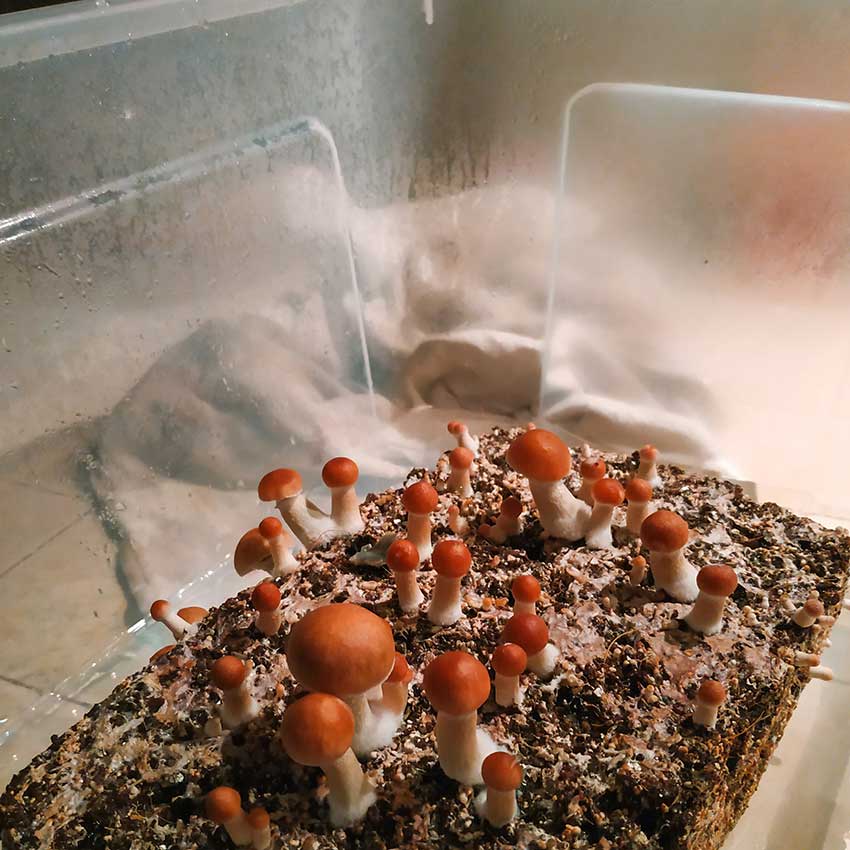
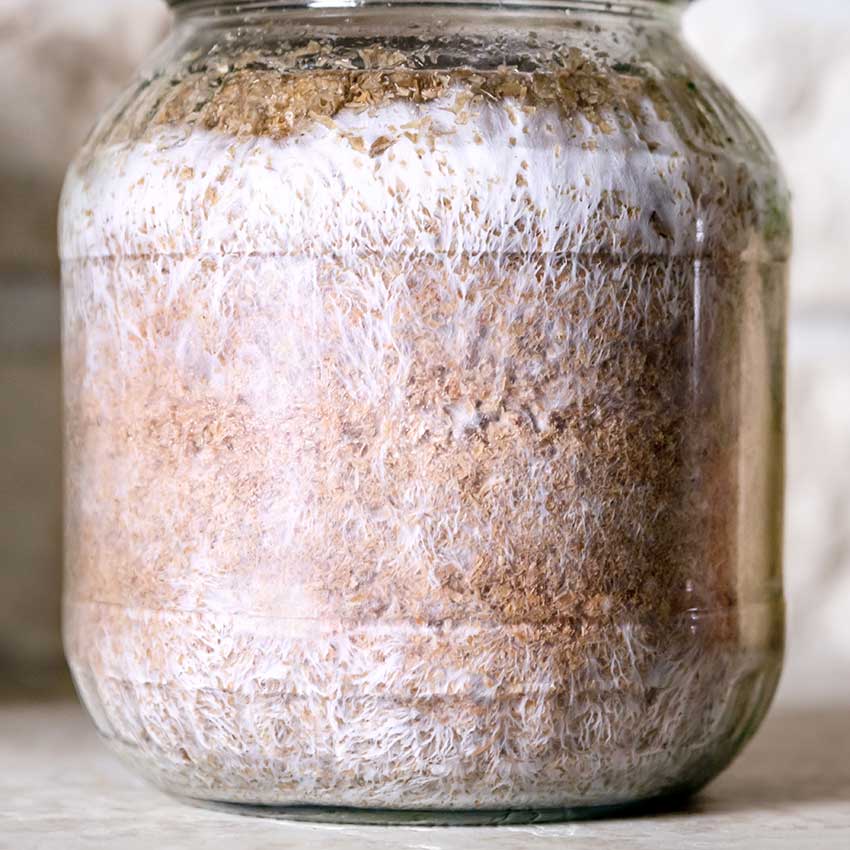
Congratulations, you’ve made your first mushrooms casing! This is the easy part, because now you have to patiently wait for your mycelium to colonize. For some myconauts, this part is both exciting but can seem agonizingly slow as you watch your fungi take root, spread across the mushroom casing layer and begin to bloom. After about 5-7 days, you should notice the white, furry looking mycelium spreading throughout your substrate. Once the mycelium have proliferated into a noticeable layer of fungus across the entire container, move the container to an area with no direct light (sun or artificial), and somewhere that you can manage the humidity and airflow.
Using a mister is typically enough to maintain the right conditions for your mushrooms, but some more experienced myco growers advocate the use of terrariums and more sophisticated cultivation setups. These are excellent for increasing your mushrooms’ chances for success, potency and manageability, but you can DIY stable conditions for your mushroom casings with simple tools like misters, spray bottles, oscillating fans and other household equipment.
Try making your own magic mushroom casing with these simple steps and easy-to-assemble casing tek, and soon you’ll be watching eagerly as your very own shroom colony is blooming before your very eyes.
FREQUENTLY ASKED QUESTIONS:
How do you make a mushroom casing?
Mushroom casing is quite easy to assemble in your own home or workshop. You will need a substrate like vermiculite, purified water, a container/case for your mushroom colony, a mixing bowl and utensil, and the mushroom strains you want to grow in the form of mycelium cakes or jars.
What is a casing layer mushroom?
Casing layer mushrooms are any fungi that are grown using the methods of casing tek, such as colonizing a layer of moist substrates with mycelium. Mushroom casings are very DIY friendly, and they are an affordable way to cultivate many kinds of fungi, such as psilocybe cubensis.
Is a casing layer necessary?
The casing layer is essential to the mushroom casing technique, as it forms the medium/substrate from which your mushrooms colonize, and it maintains the moisture/humidity conditions that many mushrooms species thrive in.
How do you know if a mushroom is psychedelic?
There are over 180+ species of psychedelic mushrooms that have been currently identified. For a mushroom to be psychedelic means it contains the psychotropic compounds psilocybin or its derivative, psilocin. Psilocybin is a naturally occurring psychoactive compound that is capable of inducing intense hallucinations, but it is also a very effective mental health supplement when microdosed properly. For more information about microdosing psilocybin, check out our microdosing blog and dosage calculator.